I accidentally formatted my Mac’s APFS drive and lost important files I hadn’t backed up. I need help figuring out the safest way to recover deleted APFS files without overwriting data or making recovery harder.
There’s still a decent chance, but it really comes down to two things: the kind of drive it was on, and how much has happened on that drive since the deletion.
If this just happened, stop using that drive right away. Don’t install recovery apps on it, don’t copy anything to it, and don’t run Disk Utility repairs yet. Any new write to the drive can land on top of the deleted data and make recovery harder or impossible.
A format in Disk Utility also doesn’t always mean the files are instantly wiped. If it was a quick format, the file system may have been rebuilt while the actual file data is still sitting there, at least until new data overwrites it.
The tougher case is an SSD with TRIM enabled. On most modern Macs, the internal SSD uses TRIM, and once those deleted blocks are cleared, normal recovery software can’t put them back. External SSDs are a little less predictable. Whether TRIM gets passed through depends on the connection and enclosure, so sometimes an external SSD has better odds than an internal one, especially if you stop using it fast.
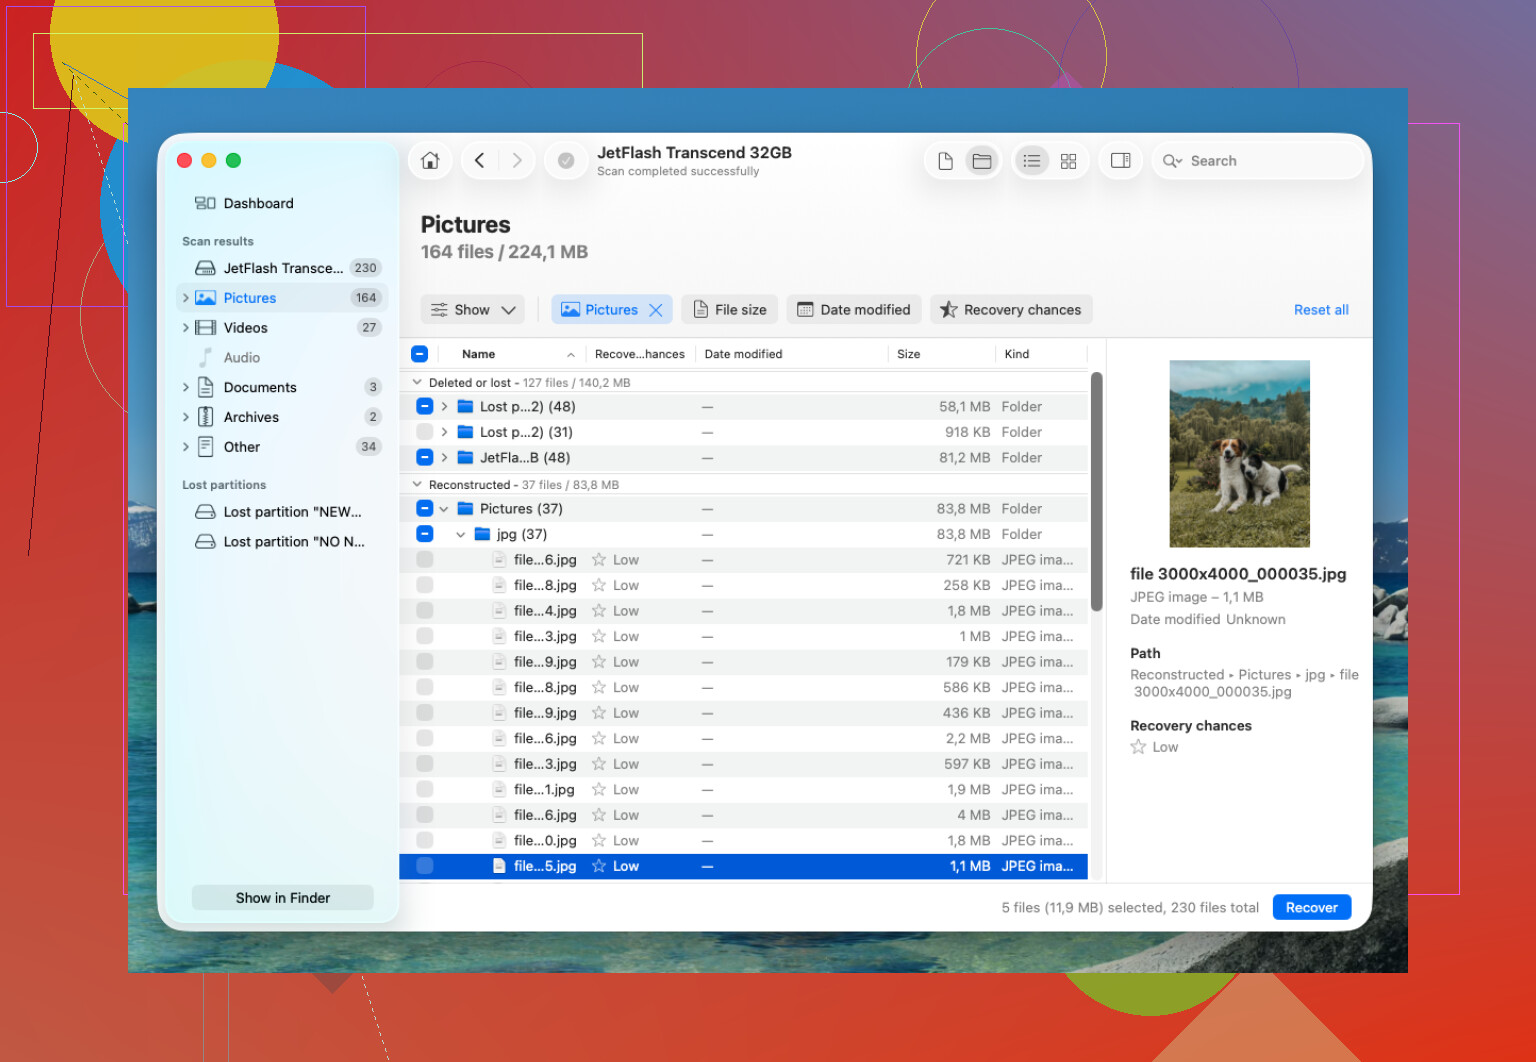
I had the best luck with Disk Drill when I deleted an APFS folder and emptied the Trash by mistake.
What worked for me was:
- Install Disk Drill on a different drive, not the one you’re trying to recover from.
- Connect the affected APFS drive.
- Give it Full Disk Access if macOS asks.
- Scan the whole APFS volume, not just a small folder.
- Let the scan finish before grabbing files.
- Preview files first to make sure they actually open.
- Save the recovered files to another drive.
The folder structure was the big thing for me. It kept a lot of the original names instead of throwing thousands of random files into one giant folder, which made cleanup way less painful.
If you don’t have a Time Machine backup, recovery software is probably the next thing to try. Also check for APFS snapshots if this was on macOS. Sometimes local snapshots exist even when your Time Machine disk isn’t connected. They’re not always there, but it’s worth checking before assuming the files are gone.
I’d hold off on Disk Utility First Aid until after you’ve copied out anything important. Recover first, repair later. Running repairs too early can change the file system in ways that make recovery worse.
If the drive is physically acting weird, like not showing up, disconnecting, clicking, freezing during scans, or taking forever to read, I’d stop messing with software and talk to a recovery lab. A lot of reputable places will evaluate it for free and only charge if they get the data back. It costs more than an app, but if the drive is failing, it’s the safer route.
Do not reinstall macOS onto that same APFS drive just to make the Mac usable again. If it’s your internal drive, shut it down and work from another Mac or an external boot disk, then scan or image the formatted drive from there. Mike’s warning about writes is the big thing, but reinstalling is the write people forget counts.
Make a clone before you go hunting.
The missing detail here is encryption. If FileVault was enabled, APFS recovery can be a lot less friendly than old HFS recovery. The password may let a tool read the volume if enough APFS metadata survived, but if the erase destroyed the old volume keys, file recovery may be basically dead even if the raw blocks are still sitting there. That’s why I wouldn’t judge the situation only by “quick format vs full wipe.” On modern Macs, APFS plus SSD plus encryption can make the window very small.
If the data matters, I’d try to image the drive to another disk first, then scan the image. That way Disk Drill or any other recovery app can grind away without repeatedly touching the original. If the affected drive is the internal Apple SSD, this may mean using another Mac, Target Disk Mode or Share Disk mode if available, or booting externally and saving the image somewhere else. Do not save the image back to the same drive.
Small warning: don’t get too excited by previews of tiny files. Recovery tools may show thumbnails, names, or fragments that look promising, while the actual large files are damaged. Check the important stuff first: photos opening full size, documents opening normally, videos playing past the first few seconds, archives extracting cleanly. If the files are worth more than the cost of a lab, stop after the first careful attempt rather than trying five different apps on the same original drive.
Do not let macOS treat the formatted disk as a normal writable disk while you poke around. If it pops up asking to initialize, repair, use for Time Machine, import photos, or “set up” anything, cancel out. Even boring background stuff like Spotlight indexing, Finder metadata, and app caches can create writes you did not mean to make.
@mikeappsreviewer is right about imaging first, but I’d be stricter about how you attach the drive. If it’s an external APFS disk, connect it only when you’re ready to image or scan it, and make sure recovered files are going somewhere else. If it’s the internal drive, don’t boot that same macOS install again if you can avoid it. Boot from an external macOS disk, use another Mac, or use recovery tools from a separate drive. The goal is to make the damaged disk a source only, never a workspace.
A detail people miss with APFS is the container versus volume thing. Disk Utility may show a newly created empty volume, but the scan should usually target the whole physical device or APFS container, not just the blank volume sitting on top. If you only scan the newly formatted volume, you may be asking the software to inspect the wrong layer. Some tools hide this behind simple labels, so take a minute to choose the broadest device-level option before running a long scan.
Disk Drill is fine to try if the drive is healthy, but don’t install it on the formatted drive and don’t judge success by the scan count. “300,000 files found” can mean a mess of browser cache, partial files, and duplicates. Sort by the file types you actually care about and recover a small test batch to another disk first. Open the recovered copies, don’t just check that the names are there.
If these are business files, family photos, or anything you’d pay serious money to get back, decide that before experimenting. A single careful image plus one scan is reasonable. Reformatting again, reinstalling macOS, running First Aid, creating a new user account, and trying five tools in a row on the original disk is how a recoverable case turns into a worse one.